How I Choose Between AI Enhancement, Try-Ons, and Lifestyle Scenes for Shopify Photos
If I am deciding how to improve a Shopify product photo, I do not start with the tool. I start with the missing information.
Does the image need a cleaner base? A better sense of fit? More context? Motion for paid social? That order matters, because a blurry original will still feel weak in a fancy scene, and a clean cutout can still feel flat if the shopper cannot picture scale.
That is why I keep coming back to Supra AI Photo Studio and its landing page at supra-ai-photo-studio.sktch.io. It bundles background removal, auto enhance, upscaling, AI try-on, object placement, UGC videos, and B-roll into one Shopify workflow. If you want to see the motion side quickly, the demo trailer is a good place to start.
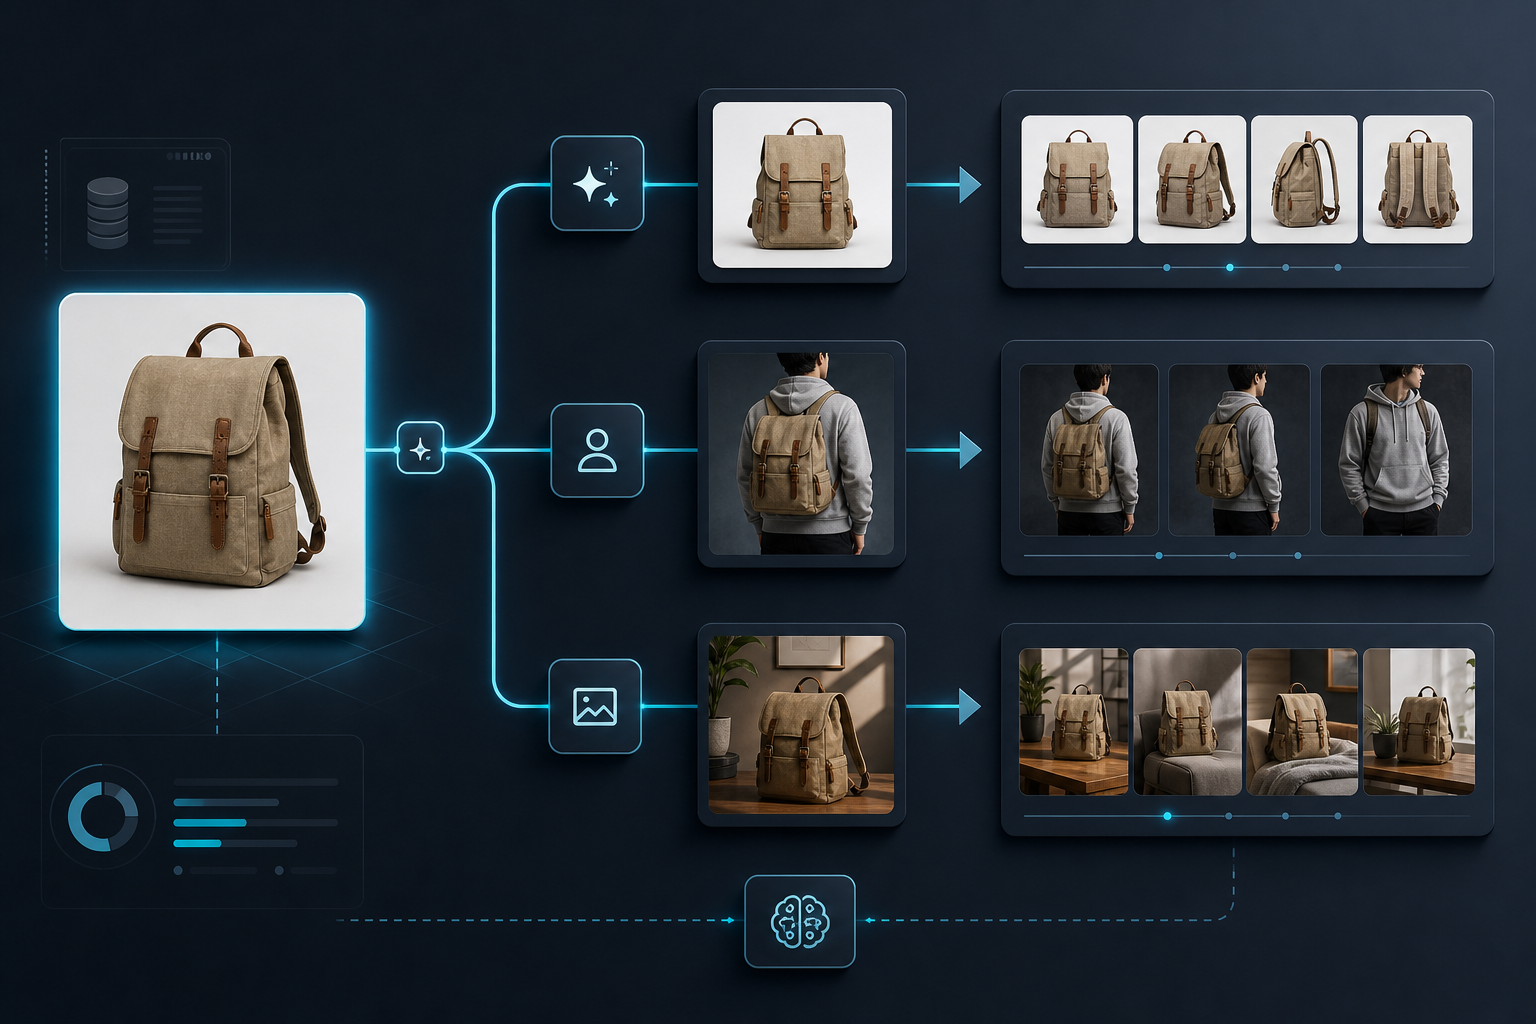
My Decision Tree
When I am trying to decide which feature matters first, I use a simple filter:
| Problem I see | First move I make | Why it wins |
|---|---|---|
| The photo is dark, noisy, or low-res | Background removal, auto enhance, or upscaling | It fixes the source before I spend time styling it |
| The shopper needs to judge fit or scale | AI try-on | It answers the "will this work on me?" question |
| The product needs a real-world setting | Object placement | It adds context without requiring a physical shoot |
| The ad team needs more variation | UGC video or B-roll | It turns one asset into multiple placements |
That table is usually where my choice gets made. If I cannot explain the shopper problem in one sentence, I am probably reaching for the wrong output.
Fix The Base Image First
The cheapest improvement is usually the one people skip. If the original product shot is weak, I would start with cleanup before I start with style.
Use the enhancement tools when the image has one of these problems:
- The background is distracting.
- The image needs sharper detail or better lighting.
- The file is too small for a large product page image.
- The product is technically right, but visually tired.
This is the step that makes the rest of the workflow cheaper. A cleaner source image gives every later transformation a better chance of looking believable.
If your current bottleneck is manual cleanup, my earlier post on replacing manual retouching is the most direct follow-up.
Use Try-On When Fit Is The Objection
Try-on is the right move when the buyer needs to imagine the product on a body, not just in a cart.
That makes it especially useful for apparel, jewelry, and accessories. In those cases, the photo is not just about aesthetics. It is about reducing doubt.

I would use try-on when:
- The product needs more confidence than a flat lay can provide.
- The store wants a more premium on-body presentation without a photoshoot.
- The same product needs multiple model looks for different audiences.
I would not use try-on when the main issue is simply poor image quality. Fix the source first. Try-on should answer fit and styling questions, not hide a broken base image.
Use Lifestyle Placement When The Product Needs Context
Some products sell better once they are placed in a believable world.
A backpack on a white background tells me what it is. A backpack on a desk, in a studio, or in a real room tells me how it fits into a day. That is what object placement is for: turning a product into a scene without staging a physical shoot.
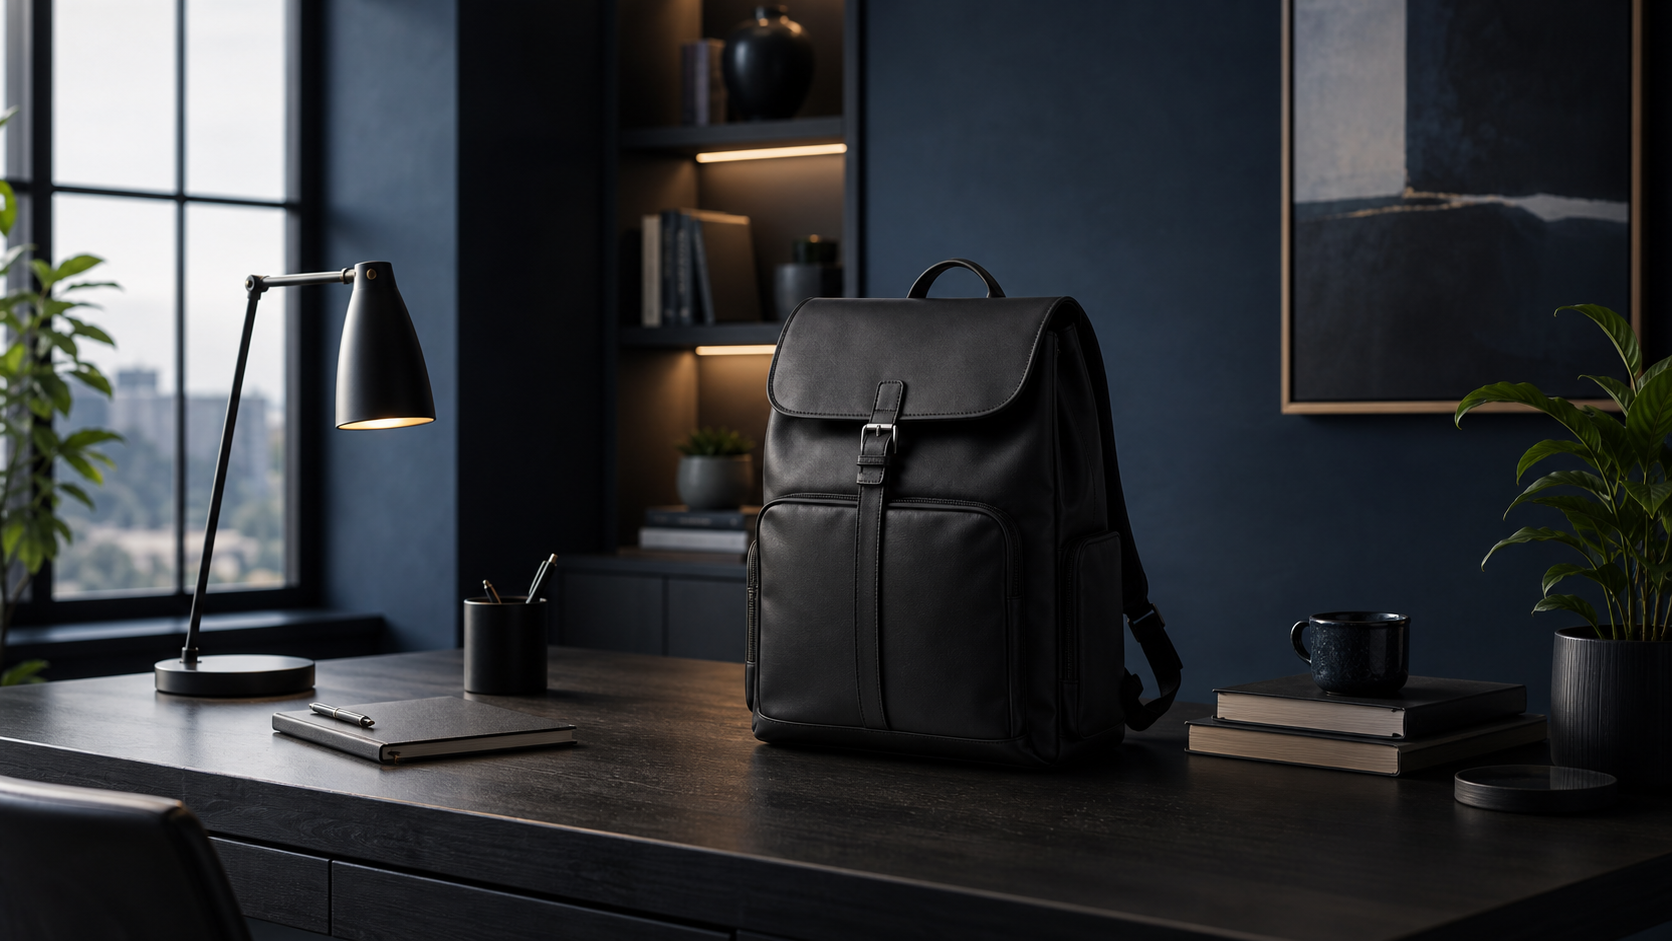
Use object placement when:
- The product is visually correct but emotionally flat.
- The page needs a stronger hero image for merchandising.
- You want to test a boutique, office, kitchen, or outdoor context.
The risk here is overdoing it. If the scene starts competing with the product, the image stops helping. I would rather have one clean, specific environment than a dramatic background that buries the object.
If you want a broader workflow version of this idea, turning one product photo into a Shopify asset pipeline shows the operational side.
Add Motion Only After The Still Images Work
Motion is useful when the still images are already doing their job and the ad or social team needs more reach.
Supra AI Photo Studio includes UGC videos and B-roll so you can turn a product photo into short-form ad creative without rebuilding the whole asset stack. That matters if you are testing hooks, not just polishing PDP images.

I would use motion when:
- The product is already clear in the still image.
- The ad team needs more creative variants.
- You want a lightweight way to test social placements before investing in a bigger production run.
If you are still debating whether to invest in polish or process, my post on cutting product photo prep time without hiring a designer is the practical middle ground.
The Simplest Workflow I Would Ship First
If I were setting this up for a small catalog, I would keep it boring on purpose:
- Upload the cleanest product shot you have.
- Run enhancement and background removal first.
- Create one try-on or one lifestyle scene, not five.
- Add one short motion asset only if you need ad creative.
- Stop and measure whether the asset improves the page or campaign.
That sequence saves time because it keeps the workflow tied to a business question. Every step should answer, "Did this make the product easier to understand or easier to sell?"
For a different angle on the same problem, building a premium Shopify image workflow without a designer stays close to the brand side while still keeping the process lean. And if you want the most direct manual-step comparison, how I built a Shopify photo workflow that replaces manual retouching is still the shortest route.
The Bottom Line
The best Shopify image workflow is not the one with the most features. It is the one that matches the shopper problem.
If the source image is weak, clean it first. If the shopper needs fit proof, use try-on. If the product needs context, place it in a scene. If the ad team needs motion, add UGC or B-roll last.
That is the order I would use with Supra AI Photo Studio, and it is also the order that keeps the workflow from turning into busywork. Start with your worst product photo, test one upgrade, and keep only the steps that actually improve the page.