How I Cut Product Photo Prep Time for Shopify Without Hiring a Designer
I care less about "pretty" product photos than I do about repeatable ones. If every SKU needs a different editing process, the catalog turns into a labor sink. That is why I started treating product imagery as a workflow problem instead of a design problem.
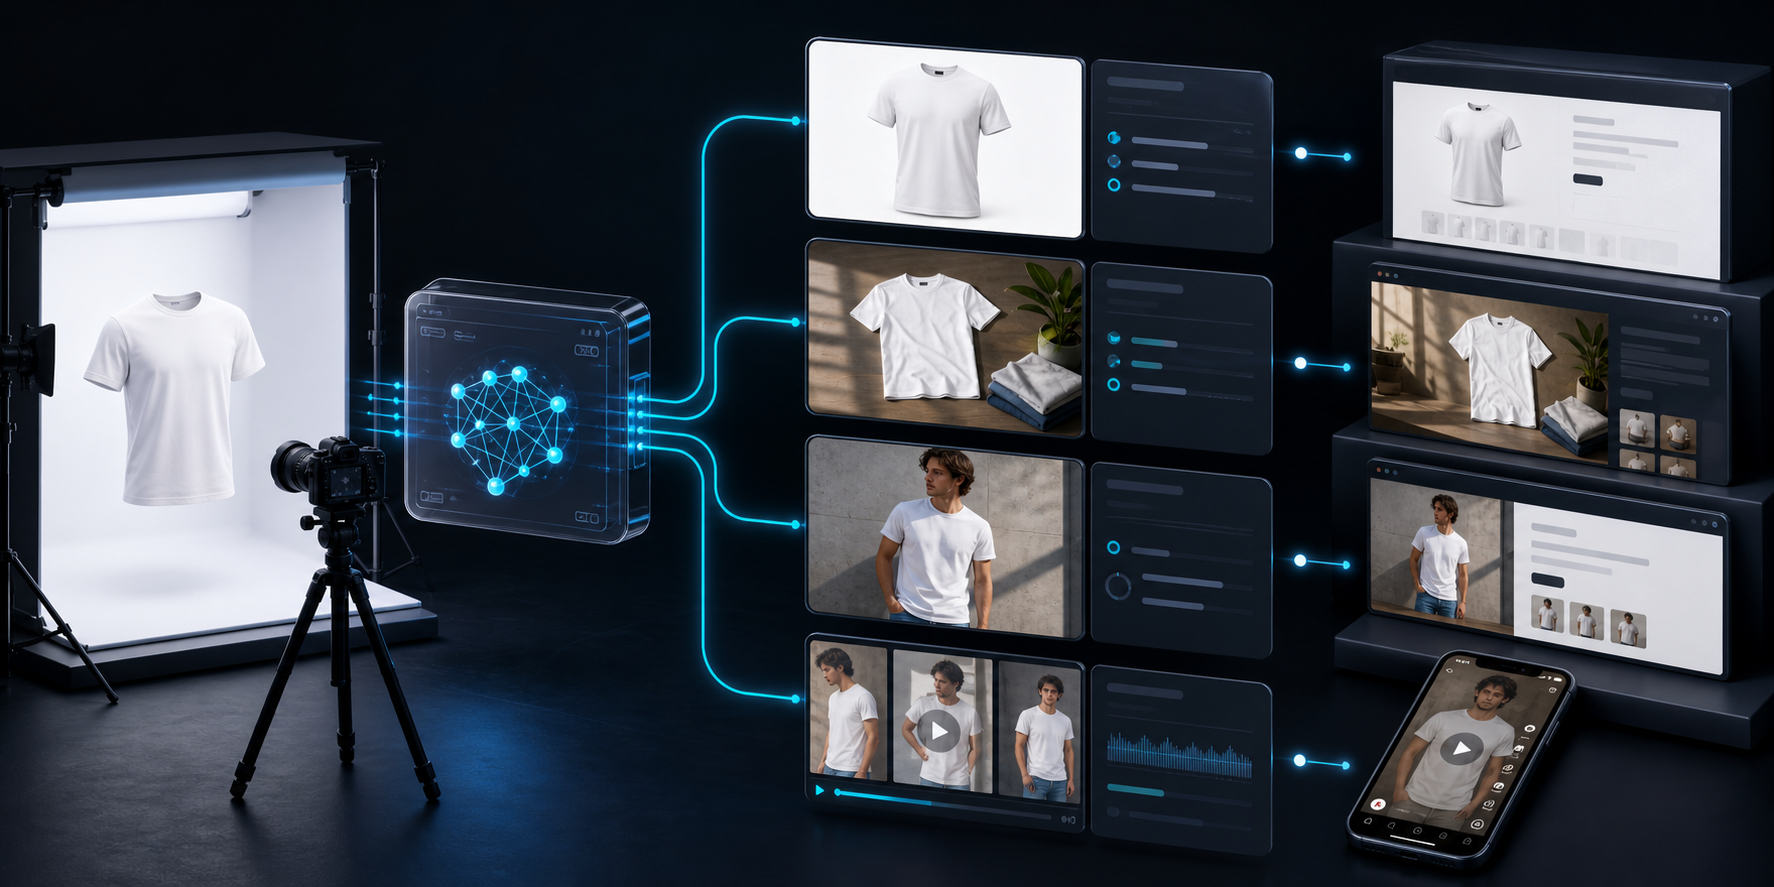
For Shopify stores, the fastest path I have found is Supra AI Photo Studio and its Shopify App Store listing. It lets me clean up a source image, place products in realistic scenes, create try-ons, and generate short ad-ready videos without rebuilding the asset from scratch every time.
What I Want From One Source Image
When I open a product file, I am usually looking for one thing: a base image that can survive being reused three or four different ways.
I am not trying to make every shot cinematic. I am trying to make every shot usable.
My quick checks are simple:
- The product shape is readable at a glance.
- The lighting does not fight the material.
- The image is sharp enough to survive cropping and resizing.
- The background is not so busy that it distracts from the product.
If a source image fails those checks, I fix the base first. That is where background removal, auto-enhance, and upscaling matter more than the fancy stuff.
My Default Sequence
The sequence I use is usually the same:
- Clean the source image.
- Decide whether the product needs catalog polish, lifestyle context, or model context.
- Generate the right output for the channel.
- Review the result for consistency before it goes anywhere public.
That order matters. If I jump straight to a lifestyle scene or a try-on before the source image is clean, I end up doing extra correction work later.
The product features that matter most to me are the ones that reduce that cleanup cycle:
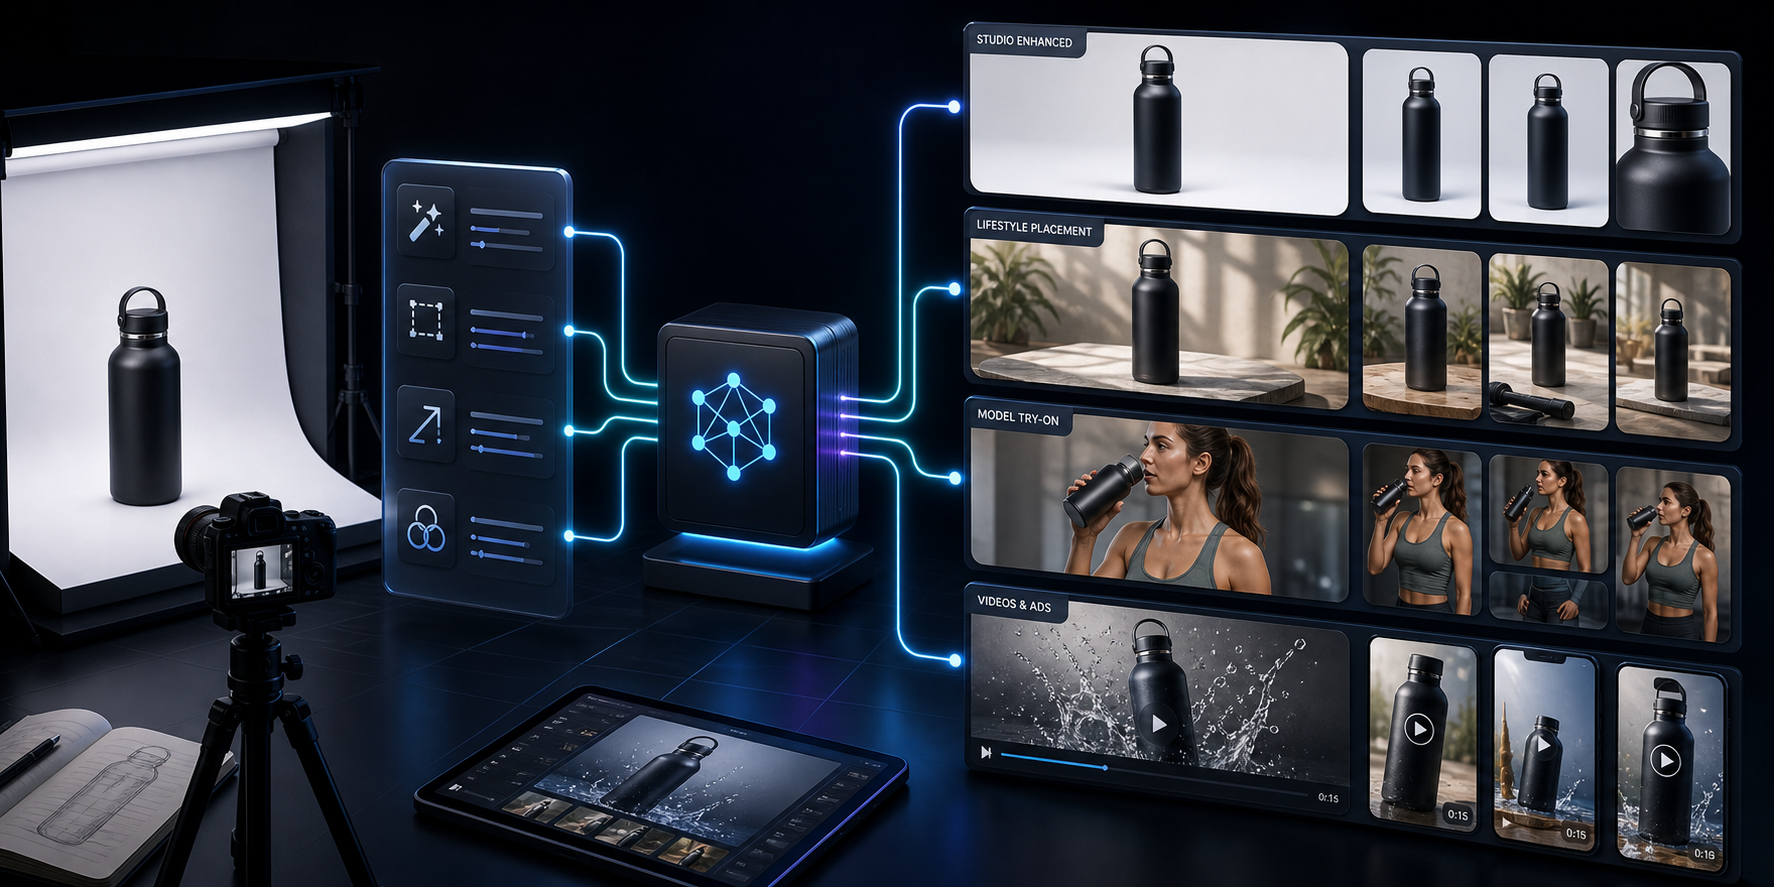
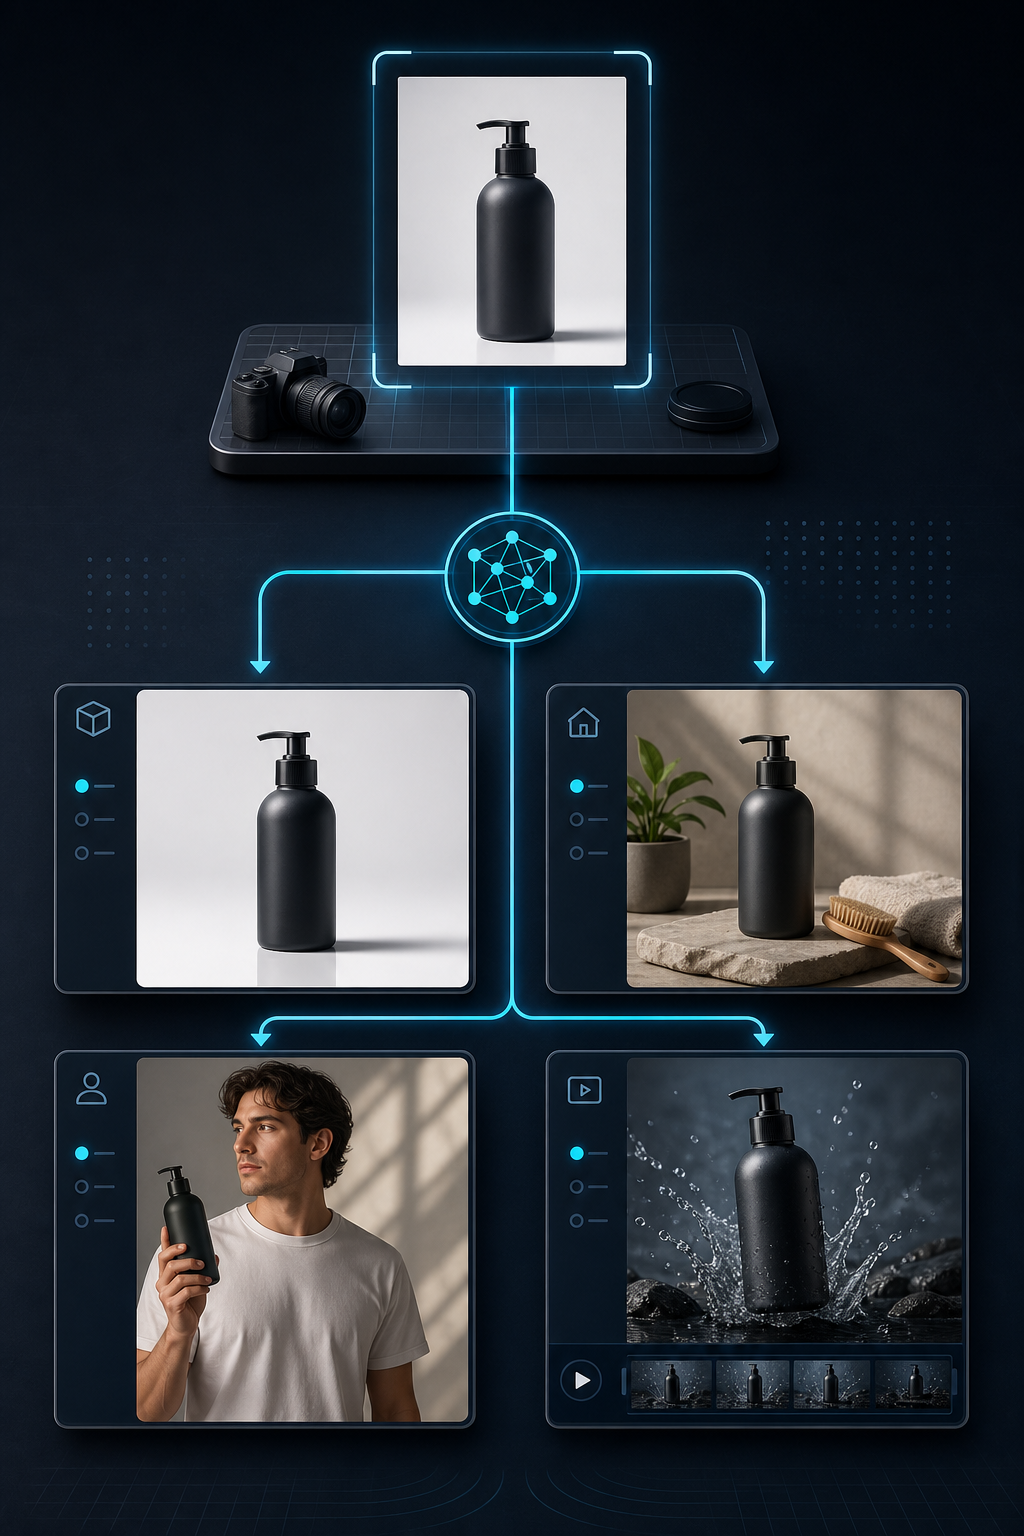
- Studio-quality enhancement for lighting, sharpness, and background cleanup
- Object placement for lifestyle scenes
- AI try-ons for apparel, jewelry, and accessories
- B-roll and UGC-style videos when static images are not enough
- Mockup embedding when I need the product to live inside a branded object
If you want the broader launch-oriented version of this workflow, How to Turn One Product Photo Into Studio-Ready Shopify Assets is the closest companion post. If your main problem is the lack of a repeatable system, How to Build a No-Shoot Product Photo Workflow for Shopify covers that angle well.
When I Use Try-Ons Versus Object Placement
I do not use the same transformation for every category.
For apparel, accessories, and jewelry, try-ons usually give me the fastest path to a believable catalog image. They help a shopper understand scale, fit, and style without a full photoshoot.
For home goods, beauty items, and electronics, object placement usually wins. I want the product sitting in a believable scene, not forced onto a model where it does not belong.
That is the trade-off I keep in mind:
| Need | Best Output | Why It Helps |
|---|---|---|
| Clean product page image | Enhancement and background cleanup | Keeps the PDP consistent |
| Apparel and accessories | Try-on | Adds fit and context fast |
| Home or lifestyle products | Object placement | Makes the product feel usable |
| Ads and social clips | B-roll or UGC video | Adds motion without a shoot |
| Branded merchandise | Mockup embedding | Keeps the design workflow simple |

That kind of split is also why I prefer a tool that can handle more than one output type. I am not looking for one perfect image. I am looking for a repeatable decision tree.
If I want the consistency angle specifically, How to Keep Shopify Product Photos Consistent Across Your Catalog is the post I would read next.
Why I Still Keep a Review Step
AI is useful, but I do not let it decide the final visual language for me.
The part I check every time is whether the generated image still feels like the same brand. I look at:
- Shadow direction
- Color temperature
- Product proportions
- Background realism
- Whether the image still matches the rest of the catalog
That review step is usually what separates a usable system from a pile of impressive but inconsistent assets.
I also do not publish every output as-is. I treat the app as a fast production layer, not a replacement for judgment.
If you want the launch-kit version of this thinking, How I Turned Plain Shopify Product Photos Into a Full Launch Kit is the better companion. It shows the same idea applied to a broader merchandising workflow.

When Static Photos Are Not Enough
The other place I save time is social and ad creative.
Once I have a strong product base, I can turn that asset into motion without rebuilding the idea from scratch. That is where short B-roll clips and UGC-style videos become useful. I am not trying to replace a full ad team. I am trying to get to a testable first draft faster.
That matters when you want a store to keep shipping new creative while the catalog is still growing.
The practical rule I use is simple:
- Use enhancement when the product image is already good but needs polish.
- Use try-ons when the item benefits from body context.
- Use object placement when the environment tells the story.
- Use video when the channel rewards motion more than stillness.
That is the real value of Supra AI Photo Studio for me. It is not just an image editor. It is a way to keep one product photo moving through multiple channels without starting over each time.
The Short Version
If I had to reduce the whole workflow to one sentence, it would be this: start with one clean product image, then generate only the outputs each channel actually needs.
That keeps the catalog coherent, saves time on manual retouching, and makes it easier to launch new products without waiting on a design bottleneck.
If you want to try it, start with one SKU and one goal. Then test the free plan on the Supra AI Photo Studio landing page or the Shopify App Store listing. If that single workflow works, scale it to the rest of the catalog.
The next step is not to make every product photo perfect. It is to make your next product photo reusable.