How to Export a Webflow Site with All CMS Pages and Assets
In the evolving landscape of web design, Webflow has emerged as a favorite for creating visually rich and dynamic websites. Yet, one limitation persists—exporting all CMS pages along with other assets like images, CSS, and JavaScript. Enter ExFlow, an innovative tool that simplifies this process, empowering users to have greater control over their creations.
Introduction to ExFlow
ExFlow stands as a pivotal tool for Webflow enthusiasts aiming to export their entire site, CMS content included, without hassle or premium costs. Whether you are a designer seeking flexibility or a developer focusing on custom hosting solutions, ExFlow bridges the gap with ease.
Why Export Webflow Sites?
Exporting a Webflow site can present numerous advantages:
- Total Control: Access and modify your site’s code freely.
- Cost-Efficiency: Avoid ongoing hosting fees from Webflow.
- Customization: Make extensive customizations unrestricted by Webflow’s platform limitations.
- Optimal Hosting Solutions: Host your site with a provider that meets your needs perfectly.
Using ExFlow for Webflow Site Exports
Exporting a Webflow site, including all CMS pages and assets, has never been easier, thanks to ExFlow. Follow these straightforward steps to gain full access to your site files:
Step 1: Visit ExFlow
Head over to ExFlow.site and enter the URL of your Webflow site.
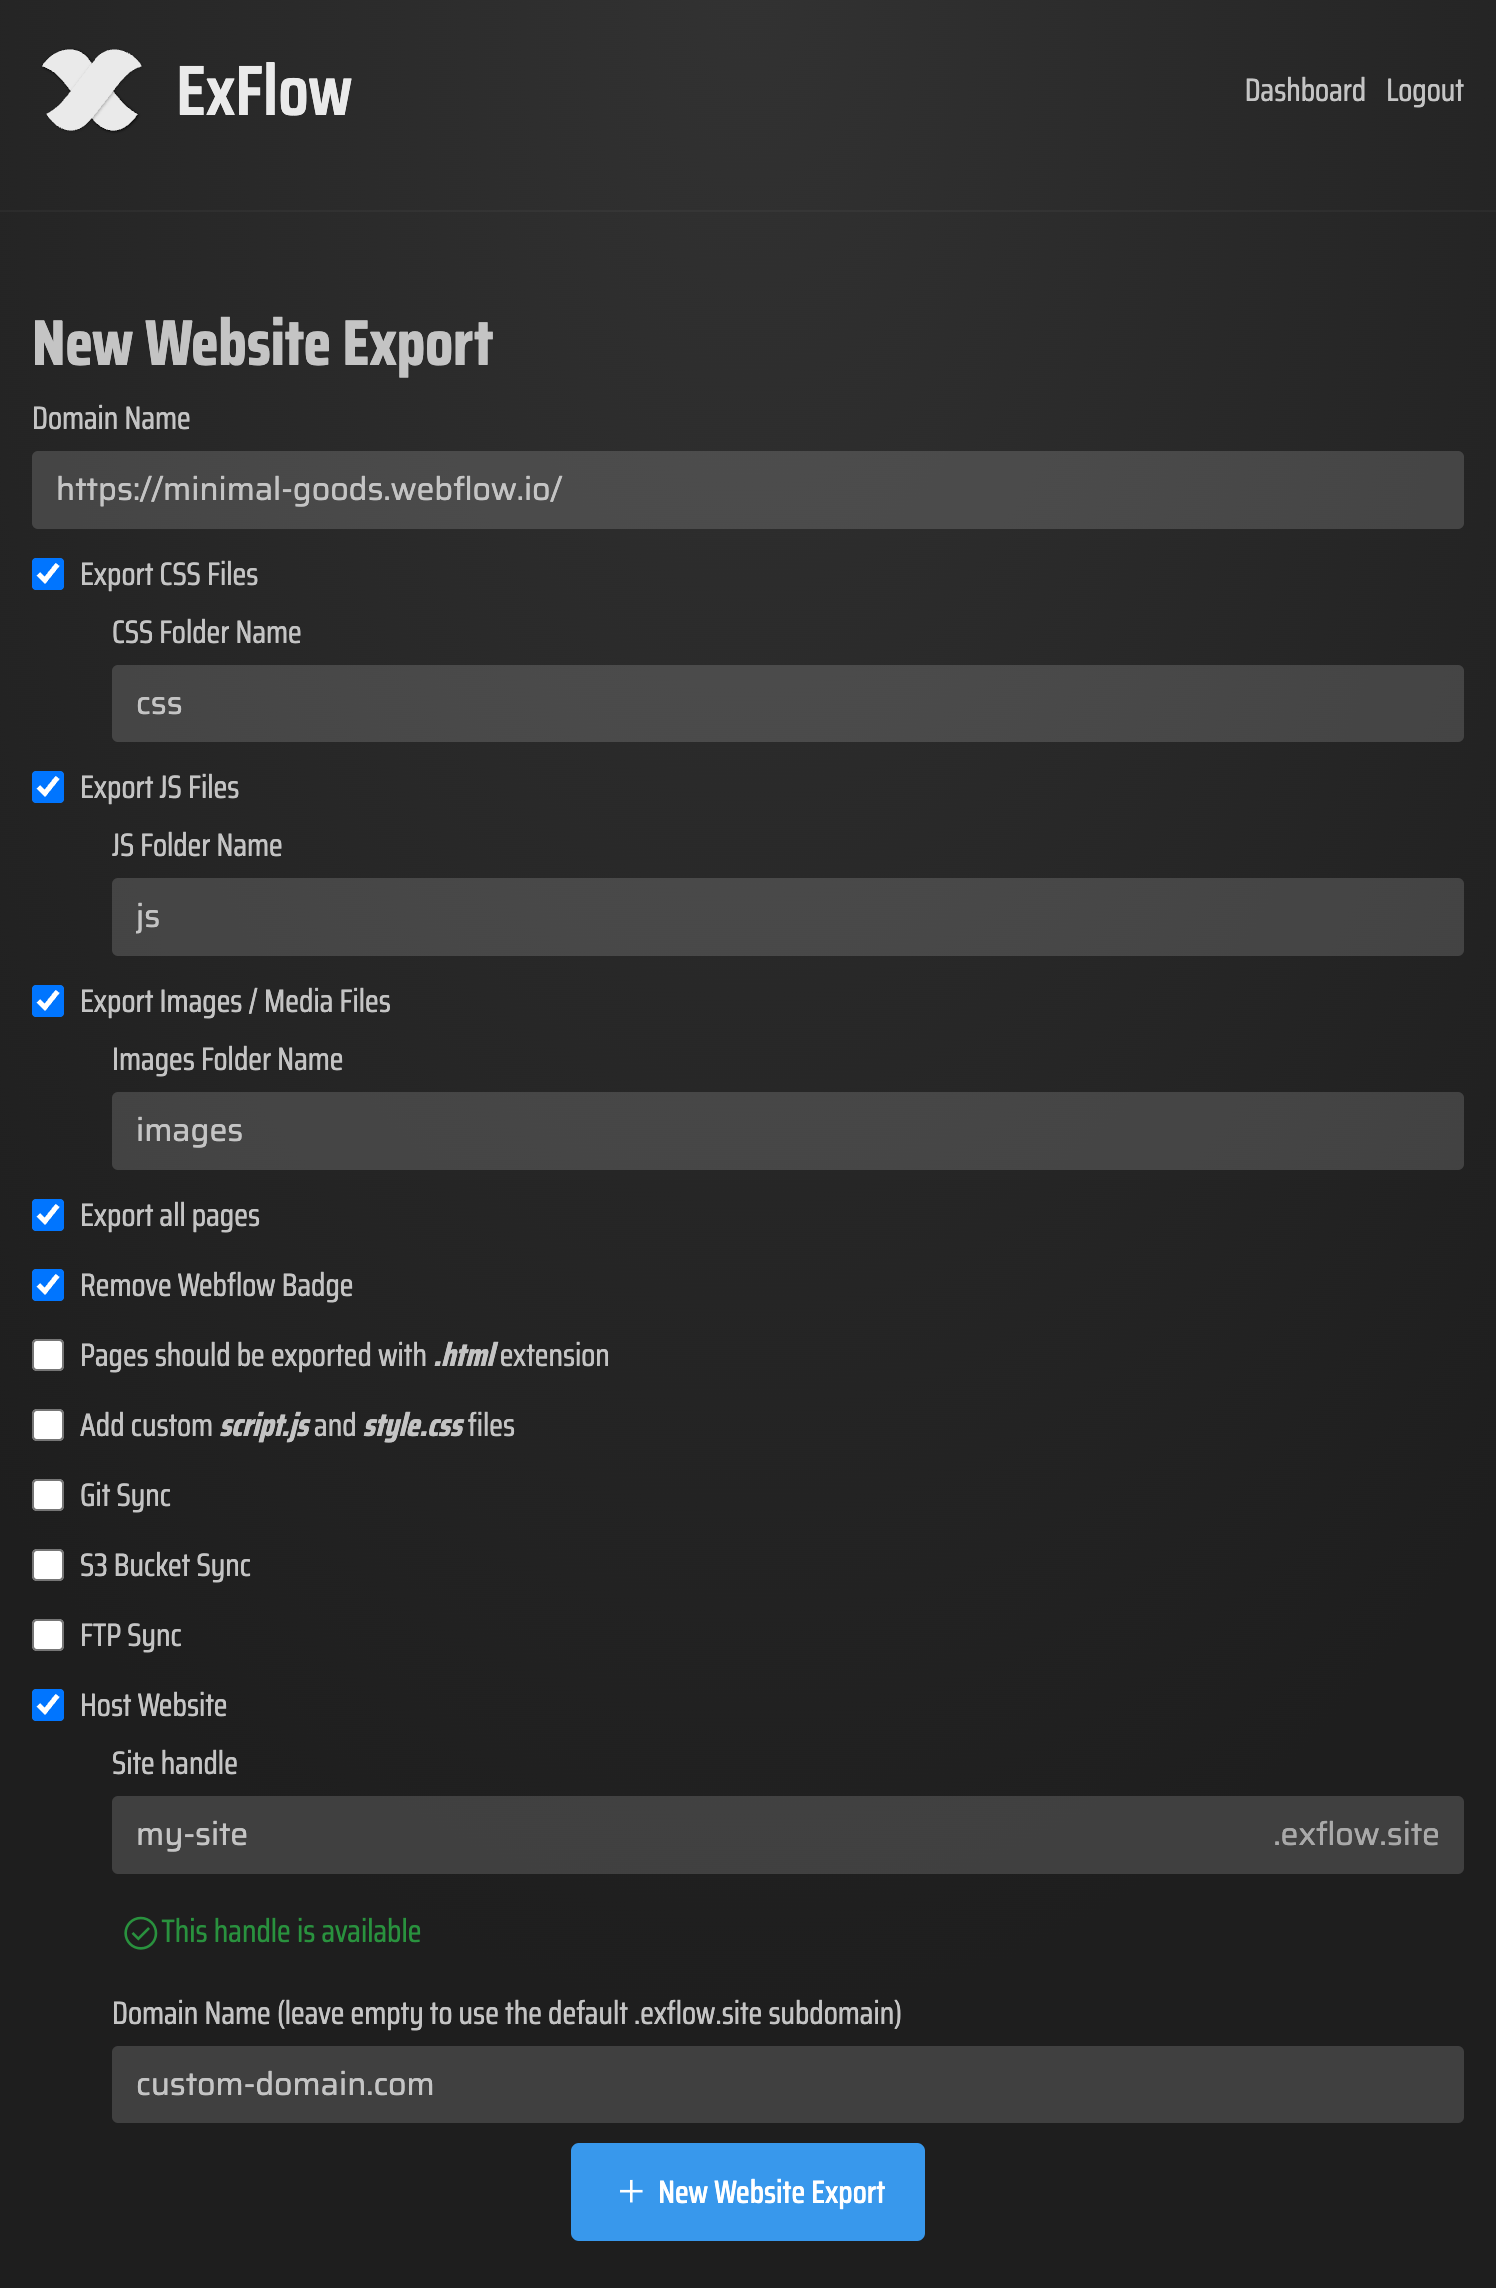
Step 2: Customize Export Settings
Once you enter your site’s URL, a set of customizable export settings is displayed:
- Asset Selection: Choose to export CSS, JS, images, and other media assets.
- Remove Webflow Badge: Opt for cleaner branding without the Webflow badge.
- Custom Scripts/Stylesheets: Add your own custom scripts or styles directly.
- Syncing Options: Seamlessly sync with S3, Git, or FTP if needed.

Step 3: Export All Pages
Ensure that all pages are selected for export, particularly the CMS pages, which aren't fully supported by Webflow’s native exporter.
Step 4: Download or Sync
After the export finishes, download the packaged files or sync them to your chosen platform—be it S3, Git, or FTP—directly from ExFlow.
Hosting Your Exported Webflow Site
Upon exporting your Webflow website, the ensuing decision involves hosting. Here are popular methods you can consider:
Hosting on ExFlow Servers
ExFlow provides a quick hosting solution directly on its servers, simplifying the entire process:
- Choose hosting during export.
- Link a custom domain for a personalized URL.
Hosting with Amazon S3
For a reliable and budget-friendly choice, AWS S3 is a robust solution:
- Create an S3 bucket on AWS.
- Use ExFlow’s S3 sync feature for easy uploads.
- Enable static website hosting in bucket settings.
Hosting with Git
Perfect for those who use version control, Git offers comprehensive deployment options:
- Sync files directly to a Git repository.
- Deploy via GitHub Pages, Netlify, etc.

Hosting with FTP
For traditional hosting solutions, ExFlow’s FTP sync makes it seamless:
- Configure FTP credentials within ExFlow.
- Files sync and upload automatically to your server.
- Ensure proper server configuration to properly serve HTML files.
Conclusion
Exporting your Webflow site, inclusive of all CMS pages and assets, is streamlined with ExFlow. By using this tool, you gain greater freedom in hosting choices and eliminate constraints typically tied to Webflow’s platform.
Ready to liberate your Webflow site? Explore ExFlow.site today and take the first step toward complete web project independence!
Additional Resources
For further insights, consider these helpful resources and guides: