How to Effortlessly Transfer Notion Articles to Webflow CMS
Streamline Your Content Management: Transfer Notion Articles to Webflow CMS with Ease
In an age where digital content forms the backbone of many businesses, efficient content management becomes crucial. This is where SyncFlow comes into play, bridging the gap between Notion and Webflow, and transforming how you manage your digital content. Let's dive into how this powerful tool can make your content management a breeze.
Why Use SyncFlow for Notion and Webflow?
Notion is a fantastic workspace tool for writing, planning, and collaboration, while Webflow offers powerful CMS capabilities to design and manage web content. By integrating these platforms using SyncFlow, you can ensure seamless synchronization and eliminate manual content updates.
Key Benefits of SyncFlow:
- Auto-Sync & Auto-Publish: Automate your content updates with SyncFlow's auto-sync feature, which ensures changes in Notion are instantly reflected in Webflow.
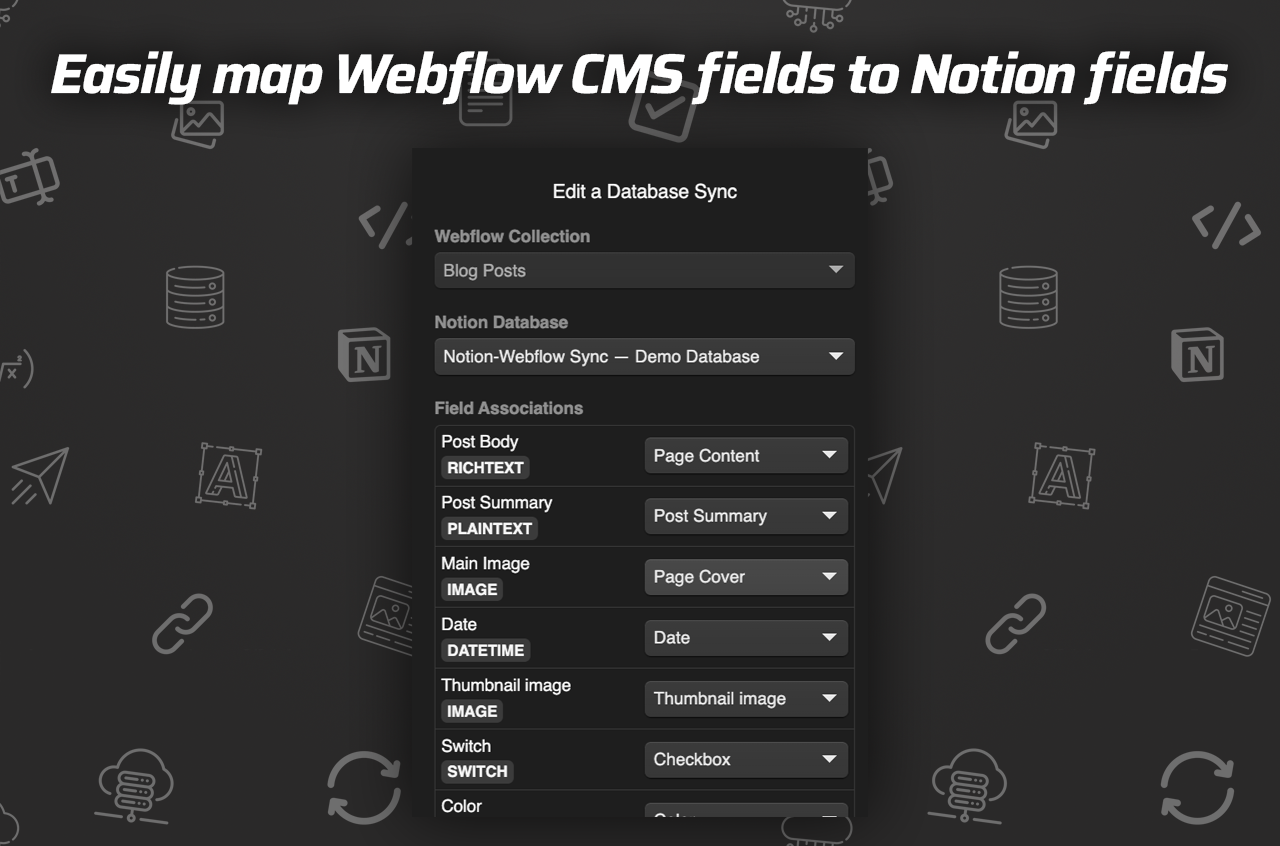
- Versatile Field Mapping: Map different field types between Notion and Webflow effortlessly, from text and images to dates and checkboxes.
- Enhanced Content Flexibility: SyncFlow supports inline styles or Webflow classes, giving you full control over content display.
- Linking and Code Highlighting: Automatically manage links between pages and highlight code blocks, making technical documentation clear and appealing.

How to Sync Notion with Webflow: A Step-by-Step Guide
Setting up SyncFlow is a simple and straightforward process. Follow these steps to connect your Notion articles to the Webflow CMS:
- Visit the SyncFlow Website: Go to SyncFlow's website and click on 'Get Started'.
- Account Setup: Either sign up or log in to your existing account on SyncFlow.
- Connect to Webflow: Launch the SyncFlow app from the Webflow designer.
- Connect to Notion: In SyncFlow, select 'Connect Notion' and choose the pages or folders to sync.
- Create a Sync Task: Click 'Sync a new database' and select the Webflow collection to sync with.
- Set Up Notion Database: Choose an existing Notion database or let SyncFlow create a new one.
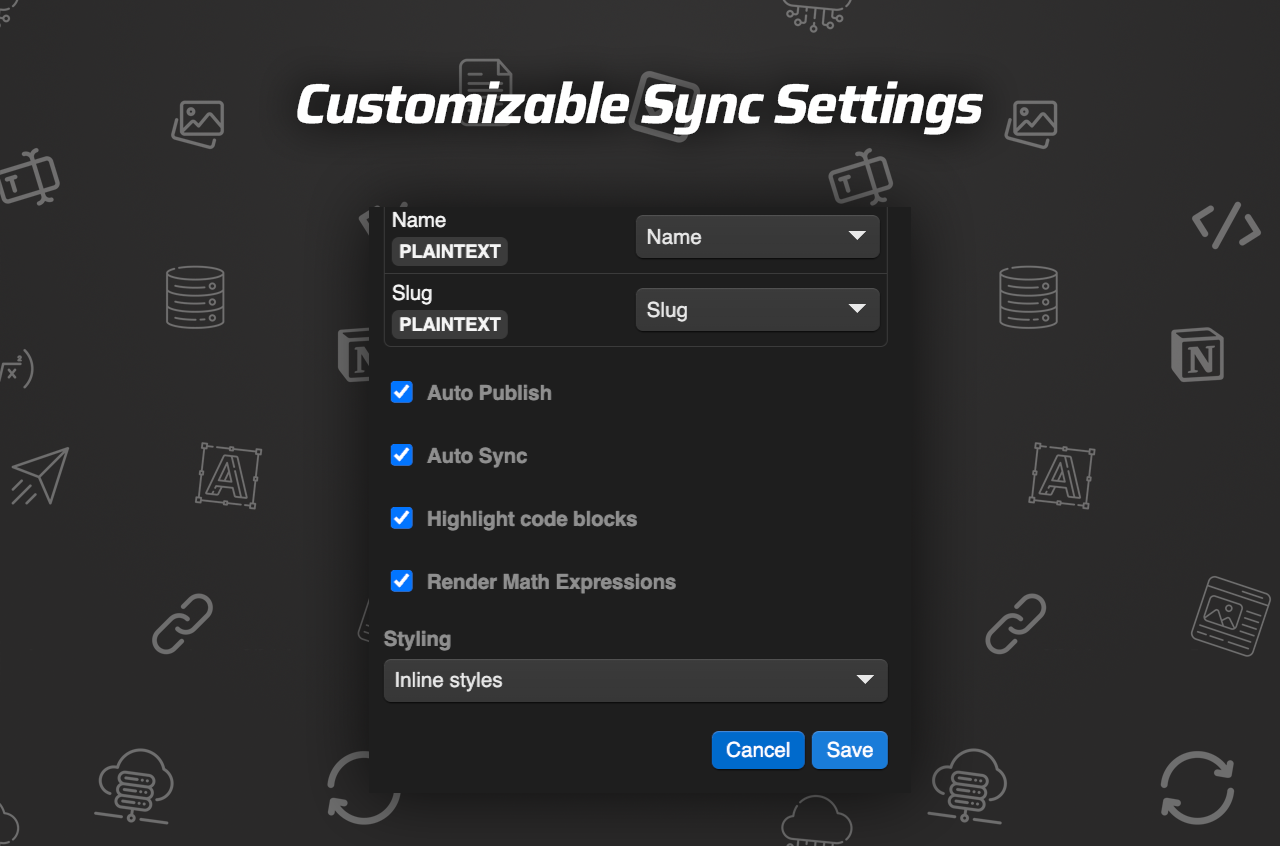
- Adjust Sync Settings: Configure options such as 'Auto-Publish', code block highlights, and math rendering.
- Choose Styling Options: Decide between 'Inline Styles' for direct transfers or 'Use Classes' for customization.
- Save Changes: Ensure that your settings are saved, establishing the synchronization link.
- Verify the Sync: Add a test entry in Notion and check its presence in the Webflow CMS.
Features That Make SyncFlow Stand Out
- Auto-Sync & Auto-Publish: Keep your website content fresh with automatic updates.
- Comprehensive Field Support: Access a wide array of supported field types for versatile management.
- Advanced Customization: Leverage either inline styles or Webflow classes for personalized content display.
- Seamless Links and Highlights: Effortlessly convert page links and enhance code readability with advanced formatting.
Watch and Learn with SyncFlow Tutorials
If you're fascinated by SyncFlow's potential and want a visual demonstration, check out these helpful video tutorials:
Time to Boost Your Content Strategy
Incorporating SyncFlow into your content strategy ensures that you maximize the benefits of both Notion and Webflow. Streamline your writing process in Notion while enjoying the visual appeal of Webflow's CMS, all with the simplicity and efficiency that SyncFlow offers.
To get started with SyncFlow and revolutionize your content management, visit SyncFlow's official site. Watch your productivity soar as you transform the way you manage digital content.
Experience the effortless synchronization and elevate your digital content management today!