How to Easily Import Notion Blog Posts into Your Webflow CMS
Introduction
If you're managing content across multiple platforms, you're likely familiar with the frustration of keeping everything in sync. The challenge becomes even greater when you're dealing with complex systems like Notion and Webflow, both powerful in their own right but cumbersome when trying to bridge the gap between content creation and web publication.
Thankfully, SyncFlow comes to the rescue. It provides a seamless connection between Notion and Webflow, allowing content creators to easily sync blog posts and other data into their Webflow CMS. In this guide, we'll walk you through the steps to effortlessly import your Notion blog posts into Webflow CMS using SyncFlow.
Why SyncFlow?
Prior to diving into the how-to of the tool, let's briefly explore its benefits:
- Auto-Sync: Automatically updates your Webflow site whenever changes are made in Notion.
- Versatile Field Types: Supports a wide variety of field types ensuring a comprehensive content management.
- Fully Customizable: Import Notion elements with inline styling or using classes for complete design control.
- Real-Time Updates: Auto-publish your content in real-time to keep your site up-to-date.
Steps to Import Notion Blog Posts into Webflow
Here is your step-by-step guide to leveraging SyncFlow for syncing Notion blog posts with your Webflow CMS.
Step 1: Visit SyncFlow Website
Head over to SyncFlow's website and click on 'Get Started'.
Step 2: Grant Access
Approve the necessary permissions to grant SyncFlow access to your Webflow sites. This integration is essential for syncing content between platforms.
Step 3: Set Up Your Account
- New User: If you're new, sign up for an account.
- Existing User: Log in with your already created account.
Step 4: Connect to Webflow
Once logged in, navigate to the Webflow designer and launch the SyncFlow app.
Step 5: Connect to Notion
Within the SyncFlow app, choose 'Connect Notion' and select the page or folder you want to sync.
Step 6: Create Sync Task
Select 'Sync a New Database' and identify the Webflow collection you intend to sync with your Notion database.
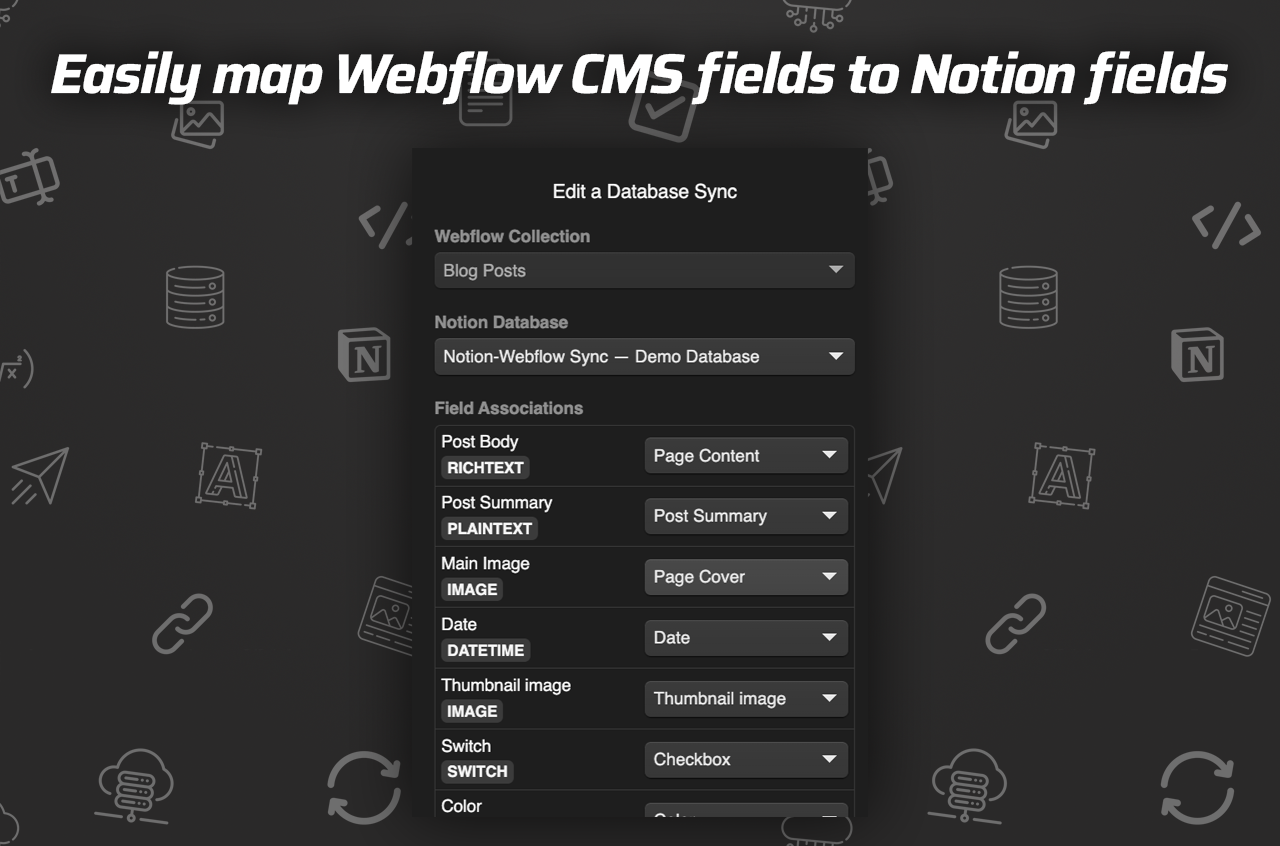
Step 7: Map Field Settings
After selecting your database, you will need to map fields from the Webflow CMS collection with those in your Notion database.
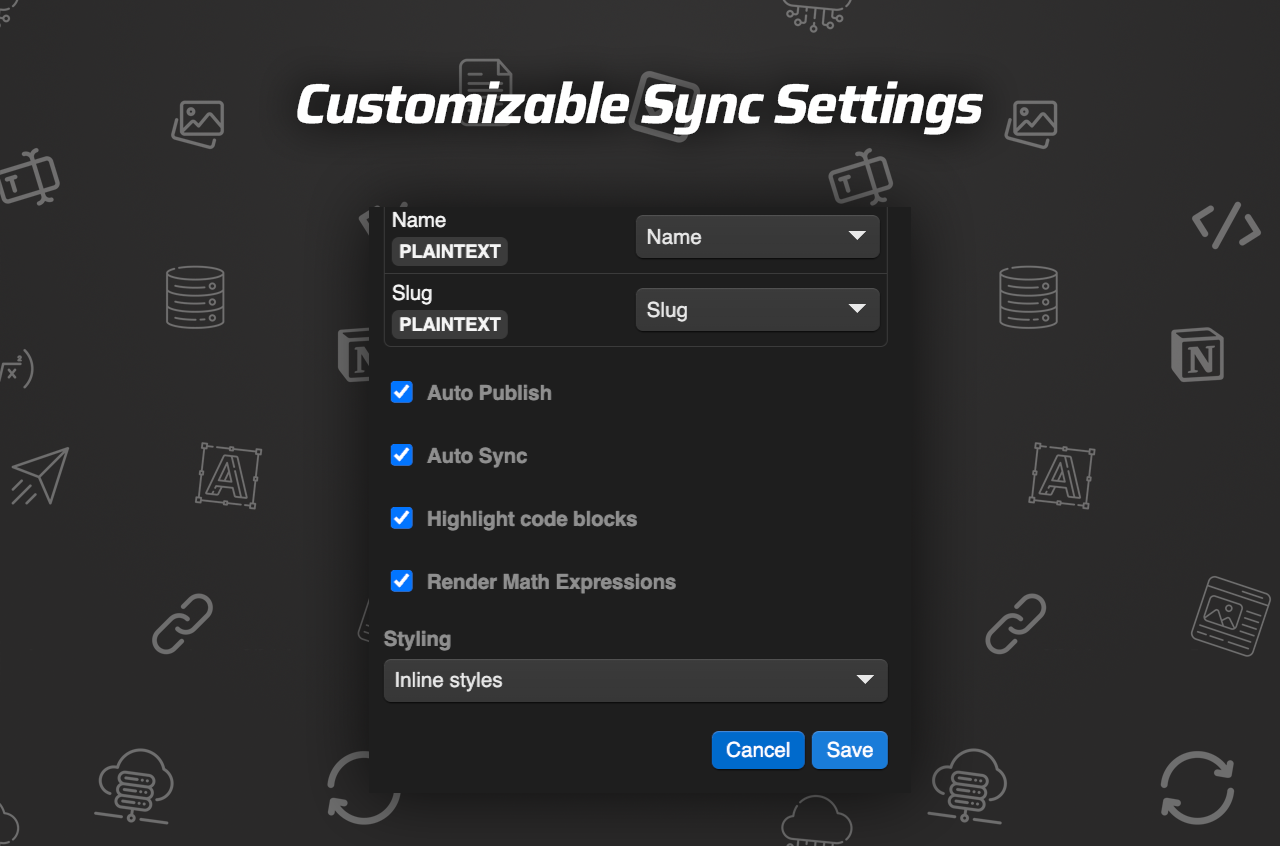
Step 8: Adjust Sync Settings
Configure features like 'Auto-Publish', 'Auto-Sync', code block highlighting, and even TeX support if you're dealing with technical or academic content.
Step 9: Choose Your Styling Option
You can either select 'Inline Styles' for direct implementation or 'Use Classes' for more customized styling within Webflow.
Step 10: Save and Verify
Save your settings to establish the connection. Test the sync by adding a new entry in Notion and verifying its presence in the Webflow CMS collection.
Step 11: Full Resync (Optional)
Use the full-resync option in SyncFlow to match existing databases entirely with a Webflow collection.
Conclusion
With these clear steps, importing your Notion blog posts to your Webflow CMS database becomes a breeze. Start creating content in Notion and see it automatically appear on your Webflow site with minimal effort. Whether for a personal blog or a business site, SyncFlow significantly enhances your workflow potential.
To see this process in action, check out this tutorial video for a visual walkthrough.
For more information on how to further utilize SyncFlow, visit their website.

Maximize your productivity and streamline your content management with this ultimate tool for Notion-Webflow synchronization!