
How I Turned One Product Photo Into a Full Shopify Marketing Kit Without a Shoot
How I Turned One Product Photo Into a Full Shopify Marketing Kit Without a Shoot
I keep coming back to the same bottleneck: one clean product photo is rarely enough.
If you run a store, that single image usually has to do the work of a hero shot, a lifestyle shot, a social ad, and sometimes even a mockup or short video. That is where I wanted less friction, fewer tools, and fewer handoffs.
So I tested Supra AI Photo Studio, a Shopify app that takes basic product photos and turns them into studio-quality visuals. The pitch is straightforward: remove or replace backgrounds, improve sharpness, correct lighting, create lifestyle scenes, do AI try-ons, build mockups, and generate short product videos.
That is a lot of output from one source image, which is exactly why I wanted to see whether it actually reduced work or just moved it somewhere else.
What I was trying to replace
My goal was not to make one image prettier in isolation. I wanted a repeatable way to go from one usable product shot to a small asset set I could use across:
- the product detail page
- email and social posts
- ad creative
- catalog and collection imagery
- short-form video experiments
That is where tools usually fall apart for me. One app is good at cleanup, another is good at mockups, another is good at video, and suddenly I am spending more time moving files around than making decisions.
Supra AI Photo Studio is interesting because it keeps those steps under one roof. The app can handle background removal, upscaling, auto enhancement, object placement, model try-ons, UGC-style videos, and mockup embedding. For a small team, that matters more than a long feature list.
The workflow I tested
The easiest way to think about the app is as a pipeline:
- Start with a plain product image.
- Clean it up so the subject is isolated and sharp.
- Create a lifestyle scene or model variation.
- Turn the same source into extra ad assets.
That is a better use of time than doing the same manual edit four different ways.

1. Start with a clean source image
The product file makes a simple point that I agree with: the better the starting image, the better the result. If the source is blurry, overcompressed, or poorly lit, the AI has less to work with.
That is why I would not use this as a magic wand for bad inputs. I would use it when I already have a decent photo and want to stretch that one asset into more useful formats.
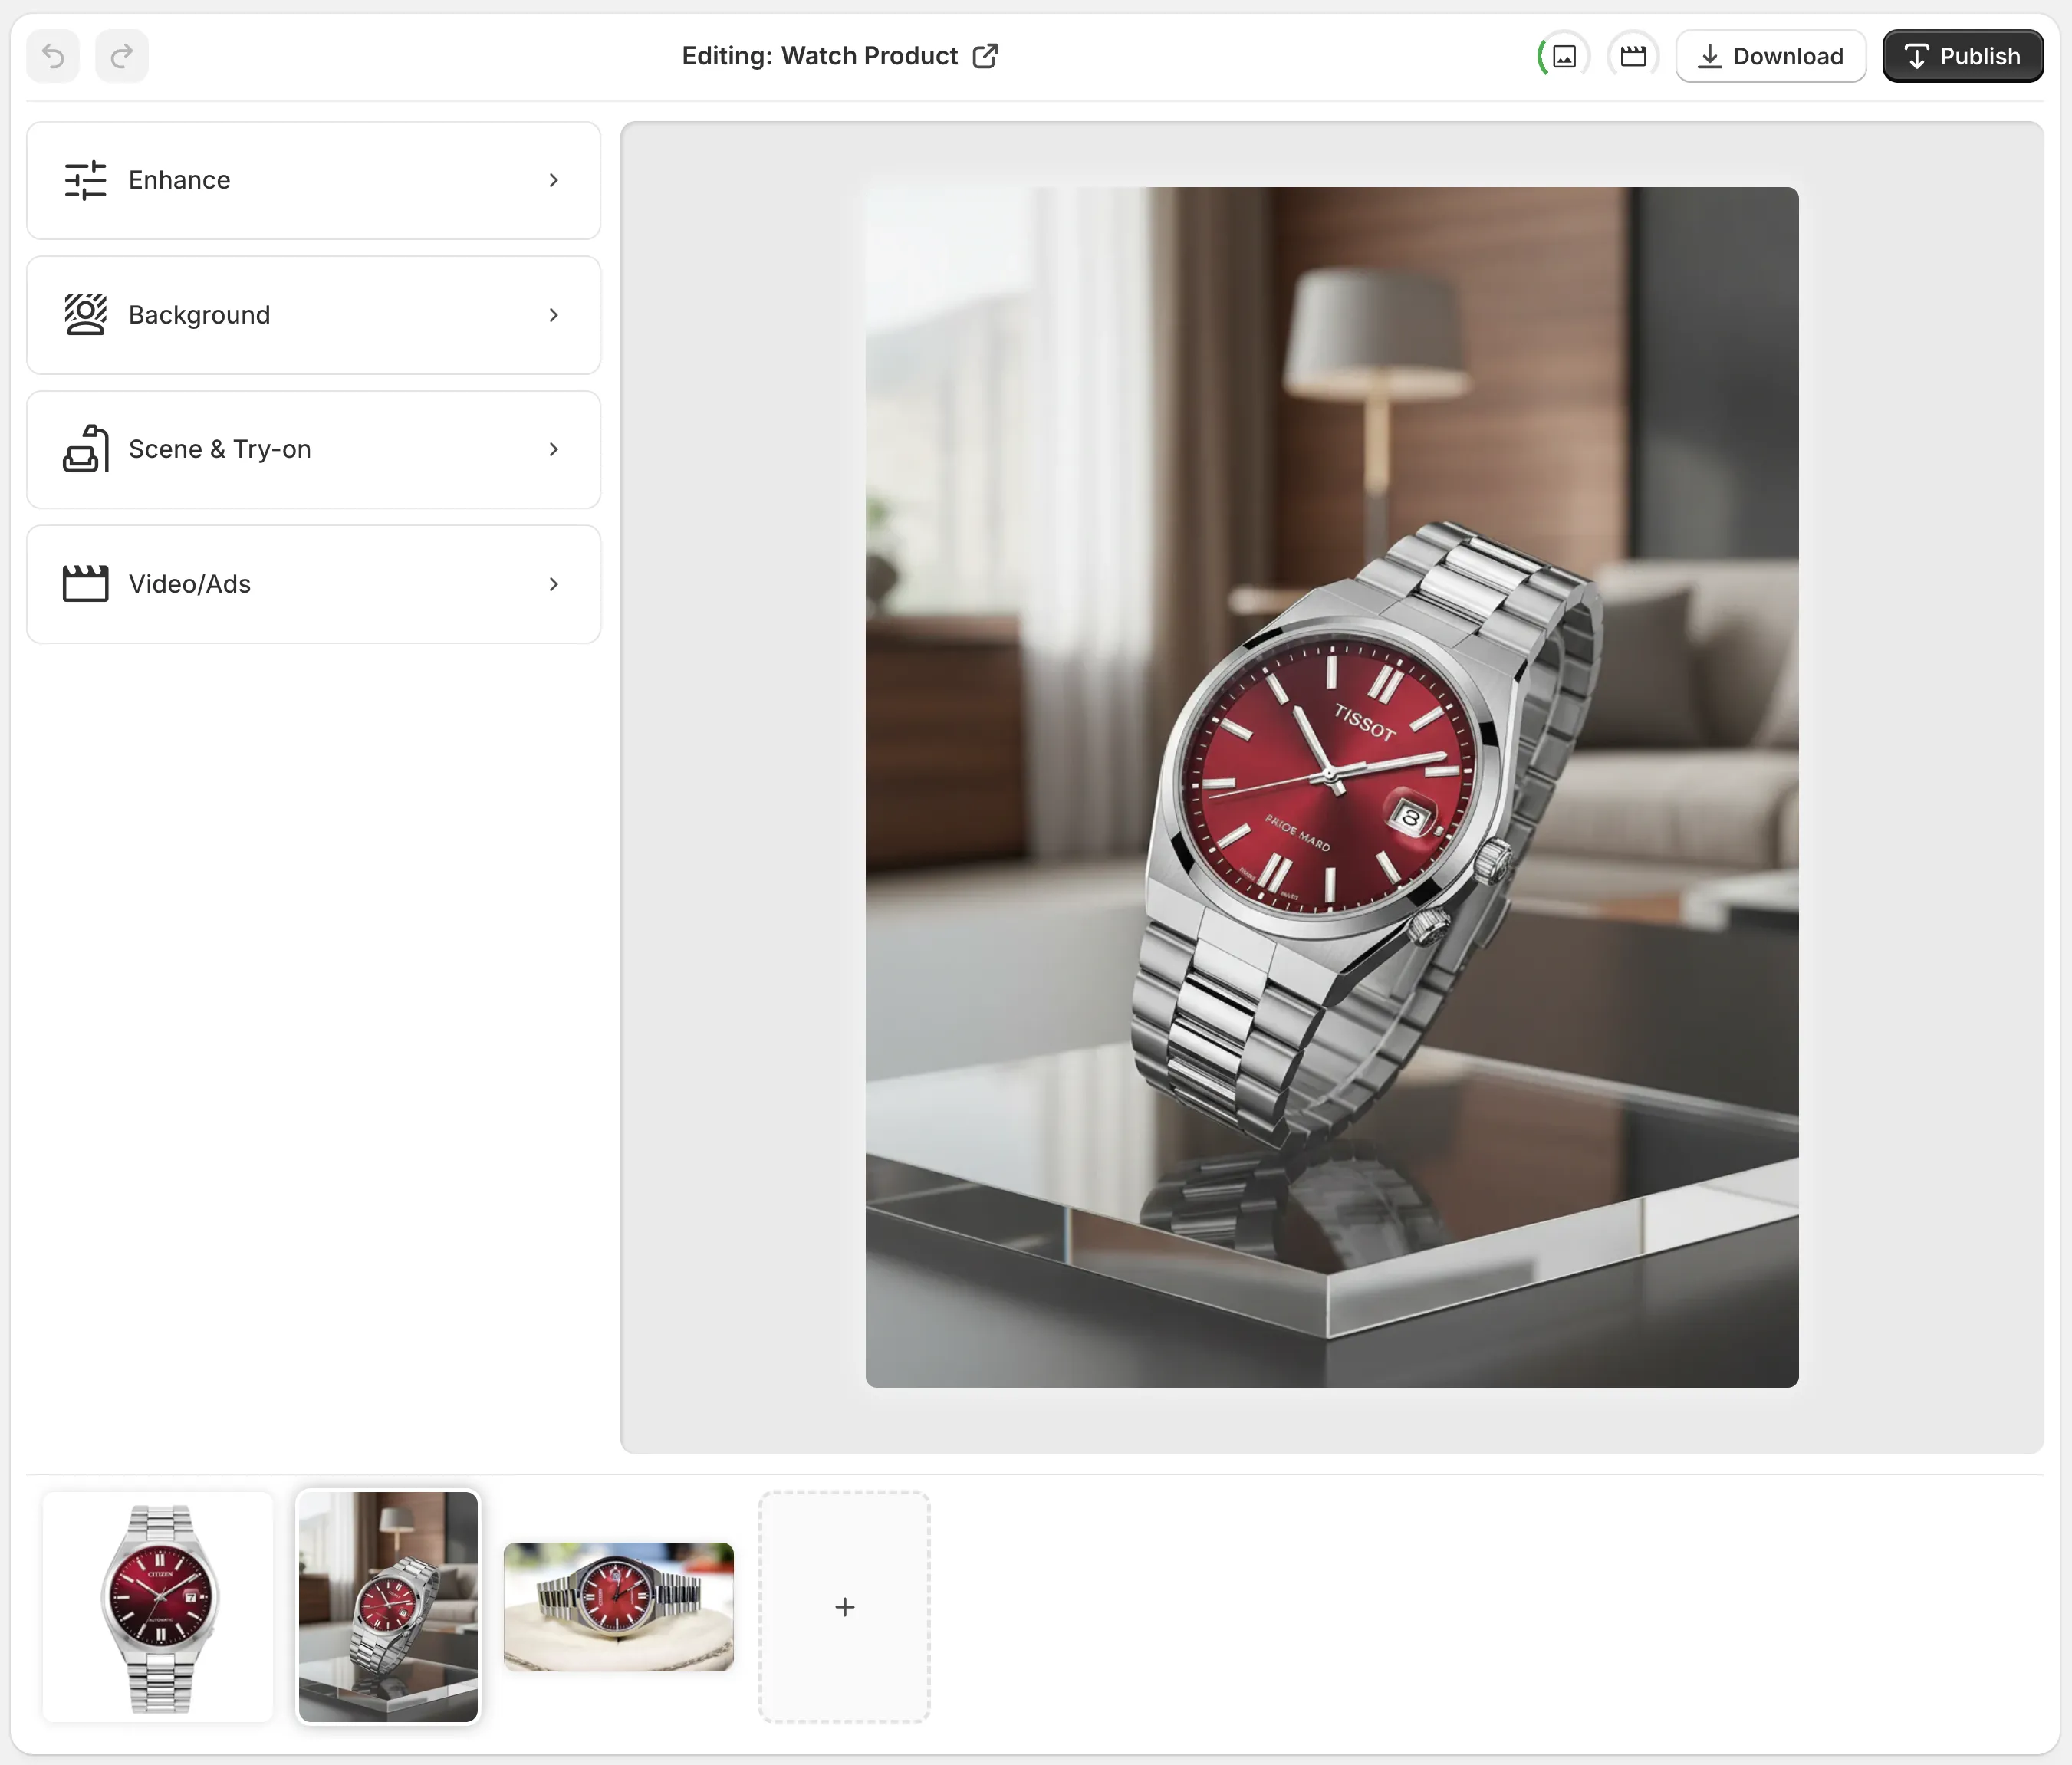
The help docs also show the editor layout clearly: top bar for undo, redo, download, and publish; tools on the left; canvas on the right; and the image gallery below. That matters because the workflow is visible enough that I can move from one output to the next without guessing where to click.
2. Turn the same shot into a better scene
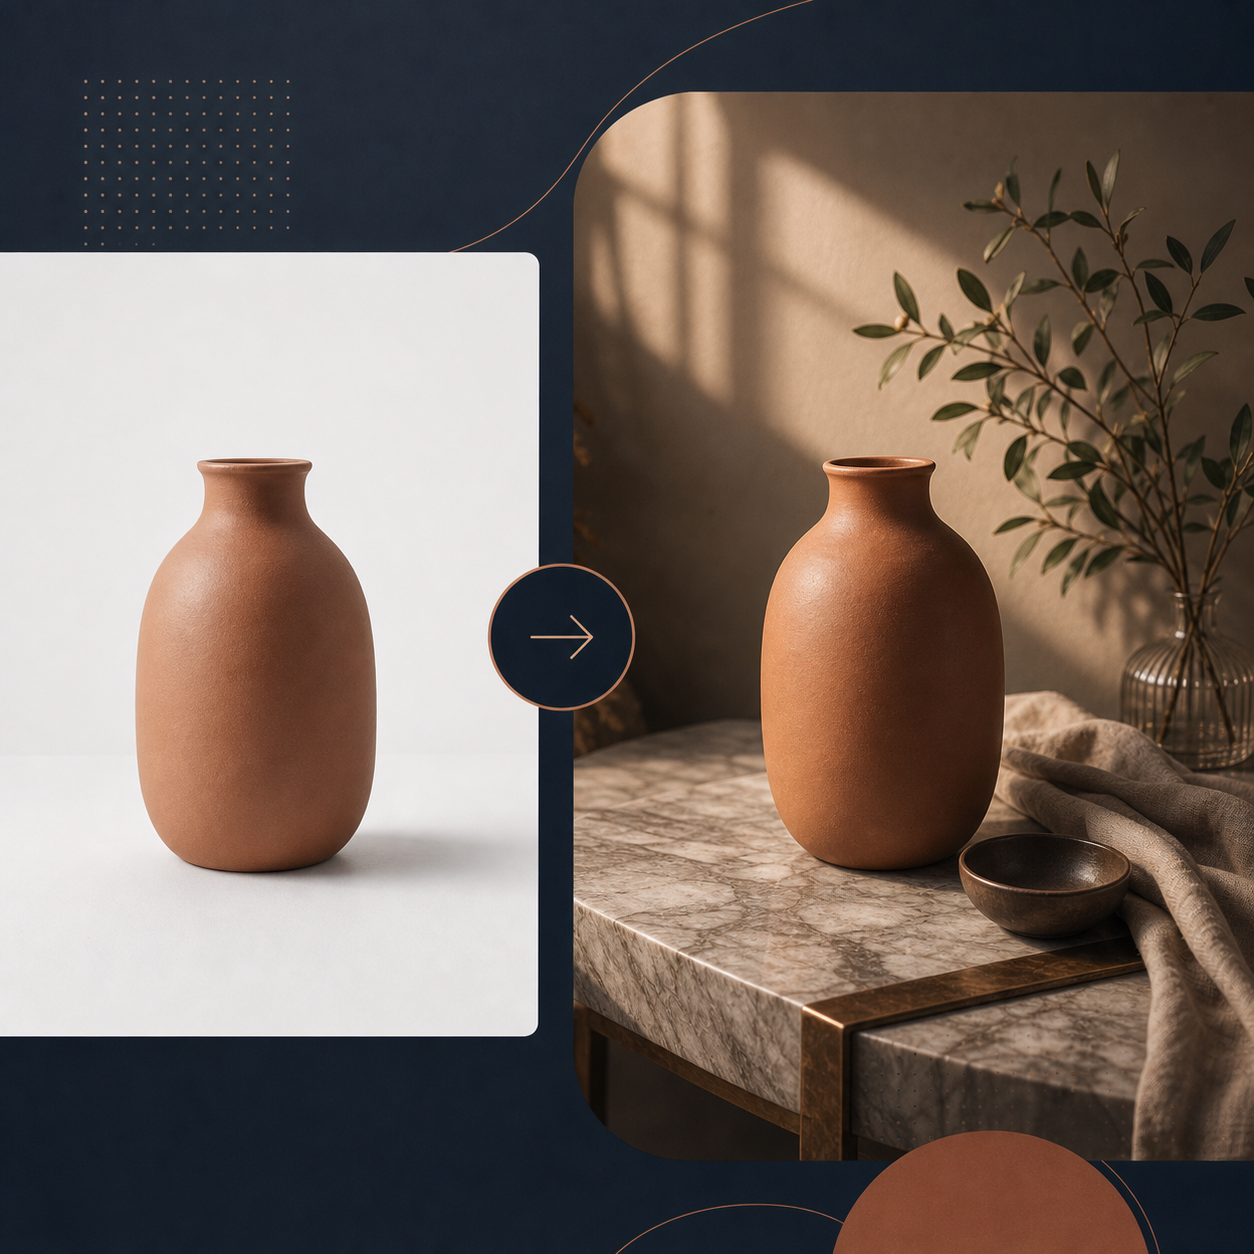
This is the part that usually takes me too many tools. I can remove the background, place the product into a scene, and then adjust the result until it looks like a real asset instead of an obvious composite.

The app is especially useful when the same product needs different contexts. The product brief calls out lifestyle placement in kitchens, offices, and outdoors, which is exactly the kind of variation I want when I am testing ad creative.
This is the point where I would also pair the workflow with How to Create Lifestyle Product Photos for Shopify Without a Shoot if I wanted a more editorial treatment of the same problem.
3. Use the app for on-model or placement variations
One of the strongest use cases here is when you need a product to show up in a more believable context. The product page explicitly supports AI try-ons for fashion, plus object placement for lifestyle scenes.
If I am selling apparel, jewelry, or accessories, I care less about whether the image is flashy and more about whether it answers the buyer’s question quickly: how does this look on a person, and does it still feel like my product?

That is also why this workflow fits well with How to Turn One Shopify Product Into Five UGC Video Ads. The still images and the short-form video assets can come from the same source material instead of living in separate production queues.
4. Use the same source for video and mockup experiments
The part I would actually budget around is not the image editing alone. It is the ability to take one product photo and build adjacent assets from it: short clips for ads, UGC-style videos, and mockup-style placements.
That matters because the highest-friction part of content production is usually not the first image. It is the follow-up work after the first image already exists.
If the app gets me to a usable image faster, I can spend the saved time on message testing, offers, or page improvements instead of endless retouching.
What actually worked for me
The strongest part of Supra AI Photo Studio is not a single feature. It is the combination.
| Decision point | I would use it when | I would not use it when |
|---|---|---|
| Source quality | the original photo is already usable | the source is blurry or badly lit |
| Output need | I need lifestyle images, try-ons, mockups, or short video | I need a high-concept art direction from scratch |
| Workflow goal | I want fewer tools and fewer file handoffs | I only need one minor crop or exposure tweak |
That is a good trade if you are trying to move faster without making the visual system messy.
It is also a better fit for stores that care about catalog consistency. If the same product can look coherent across the product page, the ad, and the social post, I spend less time explaining why the brand looks different from one channel to the next.
That is why I keep coming back to related workflow posts like How to Automate a Shopify Blog Without Generic AI Drafts and How I Set Up Shopify Color Swatches on Product and Collection Pages Without Code. They solve different problems, but the payoff is the same: less manual cleanup and more consistency.
Where I would use this first
If I were rolling this into a store system, I would start with three deliverables:
- One polished product image for the listing itself.
- One lifestyle version for ads or collection pages.
- One video or mockup derivative for testing.
That gives me enough variation to judge whether the app is actually saving time.
I would not start with ten outputs. That is how you turn a useful tool into another content project. Start with one source image and one clear goal, then decide whether the faster path is good enough to repeat.
The takeaway
What I wanted was not another AI demo. I wanted a faster way to turn one decent product shot into a usable marketing kit.
Supra AI Photo Studio is a solid fit for that job because it covers cleanup, lifestyle scenes, model try-ons, mockups, and short videos in one workflow. For the right kind of product, that can cut a lot of repetitive work out of the week.
If your store is already sitting on a few decent product photos, I would start there. Test one plain image, one lifestyle version, and one derivative for video or mockup use. If the results hold up, the app has earned its place in the stack.